- PHP Basics
- Learn PHP
- PHP Comments
- PHP Data Types
- PHP Variables
- PHP Operators
- PHP echo
- PHP print
- PHP echo vs. print
- PHP if else
- PHP switch
- PHP for Loop
- PHP while Loop
- PHP do...while Loop
- PHP foreach Loop
- PHP break and continue
- PHP Arrays
- PHP print_r()
- PHP unset()
- PHP Strings
- PHP Functions
- PHP File Handling
- PHP File Handling
- PHP Open File
- PHP Create a File
- PHP Write to File
- PHP Read File
- PHP feof()
- PHP fgetc()
- PHP fgets()
- PHP Close File
- PHP Delete File
- PHP Append to File
- PHP Copy File
- PHP file_get_contents()
- PHP file_put_contents()
- PHP file_exists()
- PHP filesize()
- PHP Rename File
- PHP fseek()
- PHP ftell()
- PHP rewind()
- PHP disk_free_space()
- PHP disk_total_space()
- PHP Create Directory
- PHP Remove Directory
- PHP Get Files/Directories
- PHP Get filename
- PHP Get Path
- PHP filemtime()
- PHP file()
- PHP include()
- PHP require()
- PHP include() vs. require()
- PHP and MySQLi
- PHP and MySQLi
- PHP MySQLi Setup
- PHP MySQLi Create DB
- PHP MySQLi Create Table
- PHP MySQLi Connect to DB
- PHP MySQLi Insert Record
- PHP MySQLi Update Record
- PHP MySQLi Fetch Record
- PHP MySQLi Delete Record
- PHP MySQLi SignUp Page
- PHP MySQLi LogIn Page
- PHP MySQLi Store User Data
- PHP MySQLi Close Connection
- PHP Misc Topics
- PHP Object Oriented
- PHP new Keyword
- PHP Cookies
- PHP Sessions
- PHP Date and Time
- PHP GET vs. POST
- PHP File Upload
- PHP Image Processing
PHP and MySQLi Tutorial
Here you will learn all about PHP and MySQLi step by step with examples.
What is PHP and MySQLi
As you already known that PHP is a scripting language and MySQLi is the improved version of the MySQL database.
Why to use PHP with MySQLi
You can use PHP scripting language on your web to connect with your database like MySQL.
If you want to operate your database or use your database to feed, retrieve, update, or delete data in your database from your website or from the web, then go for PHP with MySQLi.
With PHP, everything is possible in case of performing actions over database like MySQL.
PHP and MySQLi Tutorial Topics
This PHP and MySQLi tutorial is divided into following separate parts:
- PHP and MySQLi Database Setup
- PHP and MySQLi Connect to Database
- PHP and MySQLi Create Database
- PHP and MySQLi Create Table
- PHP and MySQLi Insert Record into Database
- PHP and MySQLi Update Previous Record
- PHP and MySQLi Fetch Record from Database
- PHP and MySQLi Delete Record from Database
- PHP and MySQLi Create SignUp Page
- PHP and MySQLi Create LogIn Page
- PHP and MySQLi Store User Data in Database
- PHP and MySQLi Close Database Connection
You will learn all the above topics of PHP and MySQLi step by step divided into separate tutorials.
Advantages of using PHP with MySQLi
Here are some advantages of using PHP with MySQLi.
- to allow users to create their account
- to allow users to login into their account
- to allow users to store their data for further uses
- to allow users to modify their informations
- to allow users to delete some information from his/her account
- to allow users to delete their whole account
Above are the list of some simple advantages of using PHP with MySQLi as there are a lot of advantages of MySQL using PHP with MySQLi.
Now let's take an example on PHP and MySQLi. If you will not able to understand the below example, then just leave it and go for next tutorial. From next tutorial, you will learn all about PHP and MySQLi step by step. And after giving some time in learning from next tutorial about PHP and MySQLi, you will feel better and can understand the below example.
PHP and MySQLi Example
Now let's take step by step example that will illustrate how to implement MySQL database using PHP with MySQLi.
Here is a simple example of PHP and MySQLi.
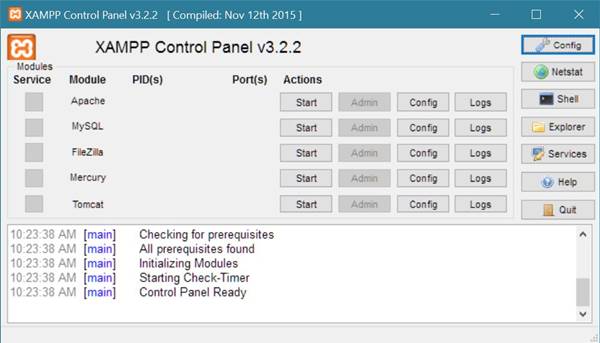
Open XAMPP software as shown here in the following figure. This is the window of opened XAMPP
Start the module named Apache (server) and MySQL (database) on clicking on the start button next to both. After starting the apache server and mysql database, your XAMPP window will looks like:
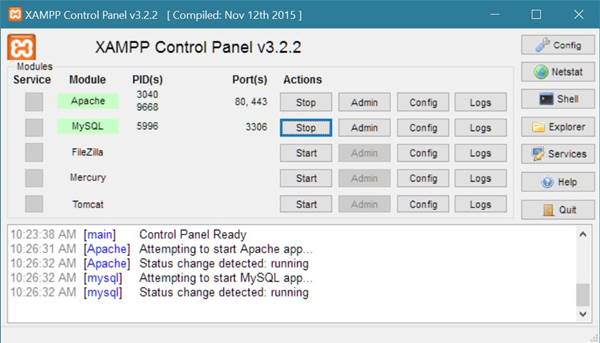
Now click on the Admin button next to the MySQL's Start button or MySQL's Stop button (after starting the MySQL database, Start button changes into Stop).
After performing the above action, you will be directed to your default browser window that will contains the phpMyAdmin pannel. Here is the screenshot of the phpMyAdmin window.
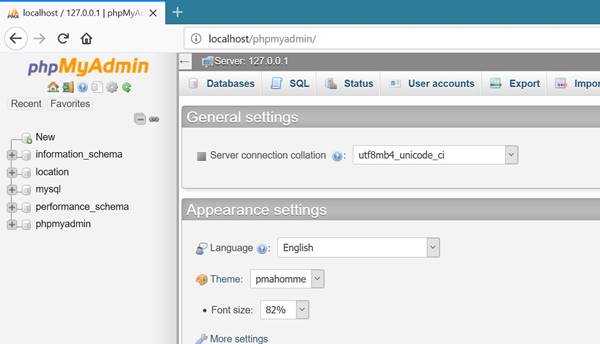
Now click on the Database link present at the top banner of the phpMyAdmin window.
After clicking on the Database link, here is the window you will see in your browser:
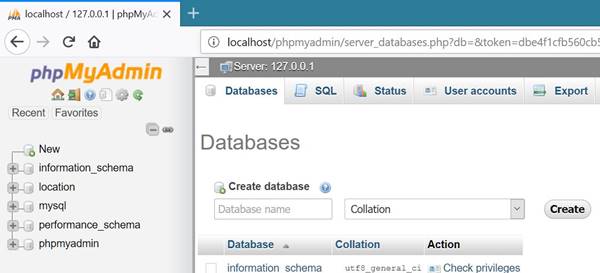
Now firstly you have to create database before using MySQL Database using PHP with MySQLi.
To create database, just click on the input box of Create Database and enter the Database name say fresherearth. Here is the demo screenshot after entering the MySQL database name say fresherearth:
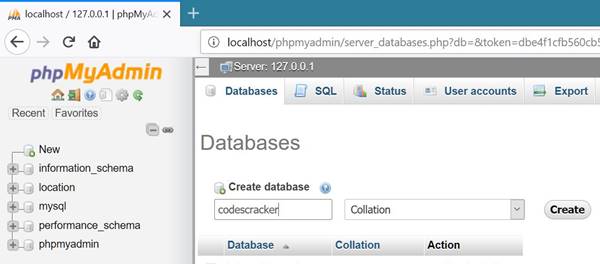
Now click on the Create button. Your database will be created after clicking on the create button and here is the demo screenshot that will come out after clicking on the create button.

This window will ask to enter the table detail (to create table) that will be store in the recently created database.
Here you will enter the name of the table and total number of column that this table will hold.
You can edit the number of column or other details of the table later. For now, here we are going to create a table with name fresherearthTable with 4 columns. Here is the screenshot demo of the entered data before creating table in MySQL database.
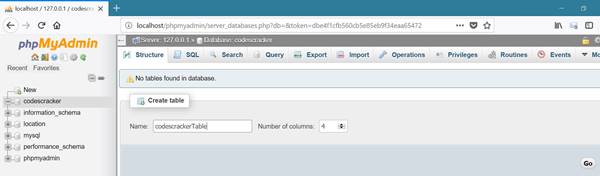
After filling the detail as shown above, just click on the Go button. Here is window that will come out after clicking on the Go button to create MySQL database table.
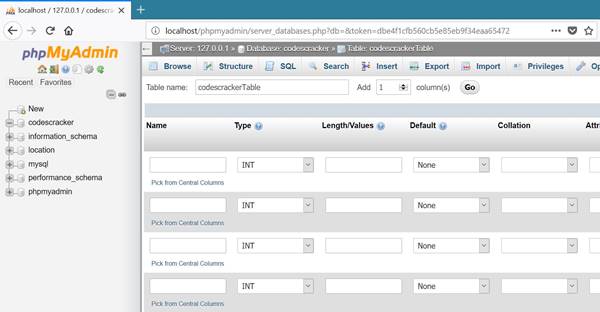
As you can see from the above window, you will be asked to enter the table details, that is columns name with its essential details.
Fill the essential field as shown here in the below screenshot after filling the details of the table that is recently created named fresherearthTable:
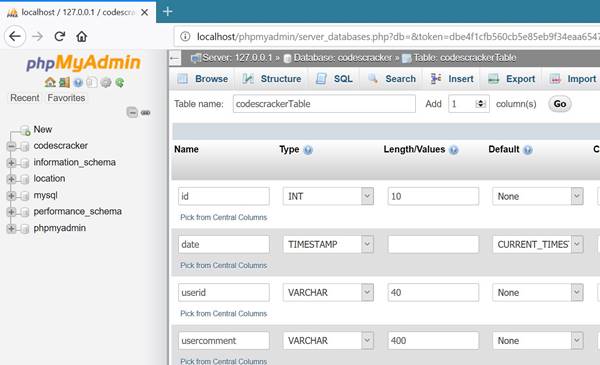
Here is the details, you have to enter in all the 4 fields one by one.
| Name | Type | Length/Values | Default | Attributes | Index | A_I |
|---|---|---|---|---|---|---|
| id | INT | 10 | Primary (then click on OK) | Tick on Checkbox | ||
| date | TIMESTAMP | CURRENT_TIMESTAMP | on update CURRENT_TIMESTAMP | |||
| userid | 40 | |||||
| usercomment | 400 |
In case of column named id, when you select Primary from the dropdown list of Index, here is the window that will come out:
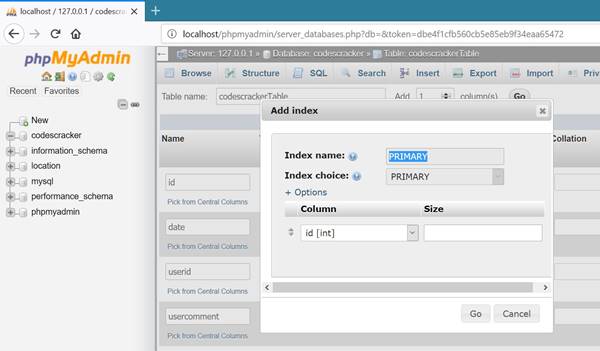
You have to click on the OK button.
In the above field A_I stands for Auto Increment.
After doing all the above things, just click on the Save button present at the right-bottom of the same window.
After saving the entered details or after clicking on the Save button, here is the screenshot of the window that will come out.
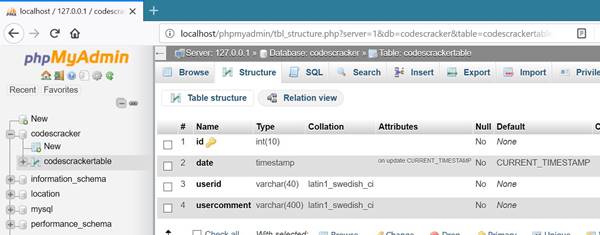
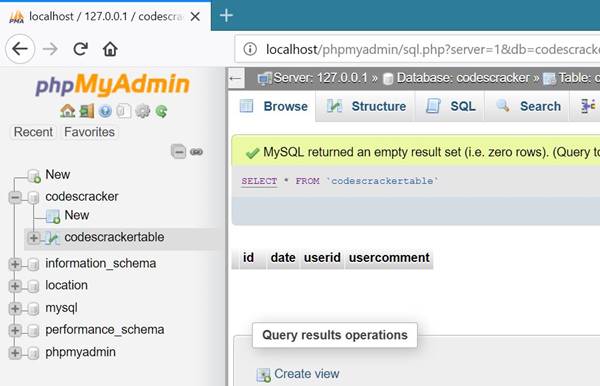
Now you have a newly created blank table with 4 column in your fresherearth database. To check it out, click on the fresherearthTable button present at the left pannel of the phpMyAdmin window. Here is the demo screenshot of the window that will present after clicking on the fresherearthTable table.
Now here is the example of PHP and MySQLi, that is used to store data or feed data into MySQL database using PHP.
<?php
   $conn = mysqli_connect('localhost', 'root', '', 'fresherearth');
   if(mysqli_connect_error())
   {
      echo "<p>Error occurred while connecting to the MySQL database.</p>";
      echo "<p>Kindly try again later.</p>";
      echo "<p>Thank You!</p>";
      echo "<p><i>by fresherearth Admin</i></p>";
      exit();
   }
?>
<html>
<head>
   <title>PHP and MySQLi Example</title>
</head>
<body>
<?php
   $userid = "fresherearth@gmail.com";
   $usercomment = "this tutorial is only for those, who are interesting to
   develop a user-friendly and database-driven website using PHP and MySQL";
   $queryStr = "insert into fresherearthTable(userid, usercomment) values('$userid', '$usercomment')";
   $result = $conn->query($queryStr);
   if($result)
   {
      echo "<p>Data inserted successfully.</p>";
   }
   else
   {
      echo "<p>Error occurred while inserting the data into the MySQL database.</p>";
      echo "<p>Please try again later.</p>";
      echo "<p>Exiting.....</p>";
   }
?>
</body>
</html>
Type the above PHP and MySQLi code or just do copy and pase the above PHP and MySQLi code and save the file in the directory C:\xampp\htdocs\ with name fresherearth.php and open your web browser and type localhost/fresherearth.php.
Here is the demo output produced by the above PHP and MySQLi example code:
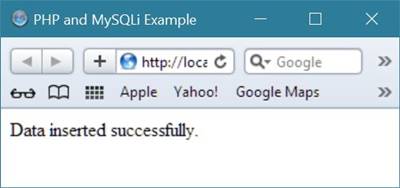
After running the above PHP and MySQLi code in your browser, your data will be inserted into the database named fresherearth.
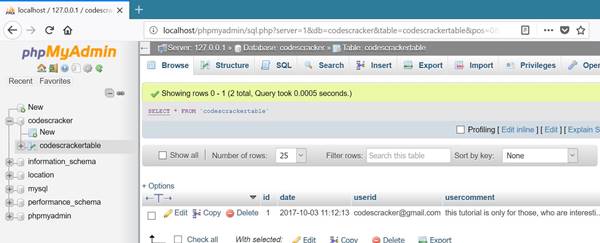
Here is the screenshot of the table named fresherearthTable that holds the data inserted recently by the above PHP and MySQLi program.
Now from next tutorial, you will learn step by step PHP and MySQLi tutorial with its detail and examples from opening MySQL database connection to closing MySQL database connection using PHP with MySQLi.
« Previous Tutorial Next Tutorial »